HVAC Troubleshooting Tips
The good news is that, thanks to modern technology and advances in equipment, it is rare that any HVAC unit stops working – at least until they’ve been in place for over a decade.
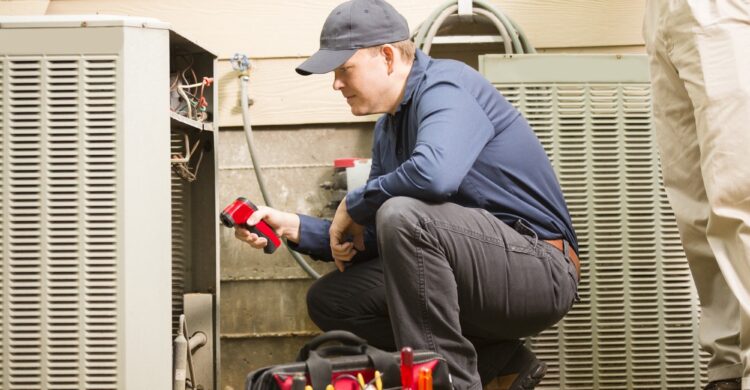
There are always exceptions, however, and if you find yourself with a malfunctioning HVAC unit, you will want to get it fixed as soon as possible. The good news is that many of the problems can be solved with some simple sleuthing and just a little bit of knowhow.
With that in mind, let’s look at some HVAC troubleshooting tips, so that you can address interruptions in your home comfort systems. These steps will also allow you to know whether it is time to call in a professional to undertake more thorough repairs.

HVAC TROUBLESHOOTING TIPS
Let’s start with the simplest steps first. These steps will also cover all aspects of your HVAC. And as dive deeper, we will look at specific aspects of heating and cooling.
- Check the power
Make sure your thermostat has power, as well as the HVAC unit itself. If the thermostat does not respond, make sure it has fresh batteries. Also check the switch at your air handler to see that it has not been turned off (it will be located on or near the unit, which is inside your home). You also need to check your home’s circuit breakers or fuses and make sure none of those are tripped or burned out. Also be sure to check the fuses or circuit breakers on the air conditioner’s compressor outside your house (these are likely located on the wall next to your outdoor unit).
- Check your thermostat settings
You, or someone in your household, may have accidentally changed the settings. So, make sure it’s set to cooling phase and set the temperature lower than your home’s current temperature reading. Give it a few minutes and see if it kicks on.
- Check the air filter
You may need to find your user’s manual for this (to either locate where the filter is housed or the appropriate size of filter). A clogged filter will restrict airflow and even prevent cool air from circulating through your ductwork. It could also cause your HVAC system’s coils to freeze. Replace it with a new one that meets your system requirements. Note that filters should be replaced quarterly (perhaps even more often if you gave pets in your home) in order to assure optimum air flow.
- Check your vents
There is always the chance that one or more of your vents was accidentally closed – or that you closed one and forgot to reopen it. Having all of your vents open is critical to maintaining balanced pressure and air flow within your HVAC’s ductwork. In other words, if one vent is closed, it may not just affect the comfort level in one room. In fact, it could change airflow throughout your entire home.
OK, now that we have discussed some of the most basic tips, let’s take a more incisive look at troubleshooting for the air conditioning portion of your HVAC. Some of these are simple, some require more time and a willingness to get your hands dirty. If AT ANY TIME you feel uncomfortable attempting any of these steps, please contact an HVAC professional and have them perform a diagnostic test on your HVAC system.
To perform the more in-depth steps of this section, you will need a multimeter, a voltage sniffer, and a set of screwdrivers and socket wrenches.
AC troubleshooting:
- Check the condenser
This is the outside unit of your AC. And because of it being outside there are occasions when debris can get into the unit, clog it up, and stop it from working. Look inside the unit and see if there is anything obviously disrupting it – such as branch that may be trapped in the fan motor. If there is any debris, you can remove it by hand or use a shop vac to suck it out.
- Check your evaporator coil
This part is on the indoor portion of your AC unit. Its job is to remove the heat and humidity that passes through your HVAC system before sending cool air into your home. However, your coils may freeze over and prevent them from working properly. You will know it is happening if you see it, as frost will be present on the copper refrigerant tubing present in the coil. However, you can also keep an eye out for this happening slowly by keeping an eye on your utility bills. If you see a slow, continued rise in your usage without another explanation, your coils could be starting to freeze up.
- Check your relay and capacitor
Some of the most common air conditioning failures come from broken contactors/relays or start/run capacitors – especially in units five years or older. You will need to purchase and repair these units.
First, ensure the power to the condenser is off by switching off all breakers to the AC/furnace unit and turn off your furnace switch. Next, open the electrical box next to your AC’s condenser and remove the disconnect box. At this point, use a voltage sniffer to make sure there is no power still flowing through the box. Inside the disconnect box are likely two cartridge fuses. Use your multimeter to determine if they are working. It could be as simple as replacing those fuses.
The start/run capacitor is located inside the condenser’s access panel. The capacitor stores electricity and releases it to help compressor and condenser startup. NOTE: You will need to discharge the energy in the capacitor before removing it, which may be accomplished using an insulated handle screwdriver.
The next step involves replacing the contactor – a mechanical relay within the control panel. NOTE: Make sure you note where all the attached wires fit within the contactor and replace them like-for-like on the new contactor.
- Replace the fan motor
First note the position of the fan blade and determine which end faces upward. When routing the motor wires through the old conduit it is a good idea to secure the wires with zip ties so that the blade does not cut them when turned on.
After replacing any of these parts, restart your AC unit. Know, however, that many units have built-in delay features that may take as long as 10 minutes to re-establish following a power outage. In the cases of energy-saving devices, it could take longer. And make sure you reverse your way through each step of the power-down process, replacing the disconnect block, turning the furnace switch “on,” triggering the circuit breaker, turning the AC “on” at the thermostat and setting the indoor temperature lower than the outside air temperature.
If these steps do not correct your system, then you need to contact a professional. You may be out of freon – which should only be handled by experienced professionals – or your system may need more in-depth repairs.
OK, now let’s look at the heating portion of your troubleshooting. The problems may include a bad igniter, a faulty flame sensor, or a misfiring high-limit switch.
Each of these parts may be fixed or replaced rather simply, though we highly-recommend that you read up on your furnace’s service manual to determine exactly where each is located within your furnace. Most service manuals may be found easily online. And before you start ANY repair attempts make sure you know your furnace model and serial number (these are printed on side panels in the burner area).
- Check the igniter and flame sensor
The igniter and flame sensor usually require replacement every four to five years and cost roughly $50 apiece – though you’ll need that model and serial number to ensure you get the right part.
The igniter and flame sensor are located inside a sealed combustion chamber and are rarely visible. Make sure to consult your service manual to properly determine their location. The high-limit switch is usually located underneath the combustion chamber.
If these tips do not solve your heater’s problems, you will require professional help.
For instance, you may need to replace your inducer fan or gas valve. The inducer fan requires special sealants and procedures to ensure it will not leak carbon monoxide. A new gas valve, meanwhile, requires you to calibrate it to your home’s gas pressure and furnace specifications. Do this one wrong and you could burn up your heat exchanger, fill it with soot, and run up your gas bill – all possibly at the same time.
So, if you find yourself facing serious HVAC concerns and either do not have the time, inclination, or comfort to try anything but the most basic troubleshooting, please know that Conditioned Air Systems professionals are here and ready to help at any time.
Our technicians have been helping homeowners to stay comfortable in north Georgia and metro Atlanta through five decades. All our technicians are NATE certified and make customer service their priority, which means they will arrive on time, assess the situation quickly, and make you fully aware of everything happening with your HVAC. It is the type of service that has made us a standard for comfort with homeowners since 1983. Call us today at 770-543-5121 to schedule your service call.
Ensure Your Home’s Temperature is Stable Year-Round
